MyPortal – edit my demographic data
Use this procedure to edit your demographic data such as Gender Identity, Race/Ethnicity, and Veteran/Military Status.
Note: The look and feel of the demographic data may differ depending on your browser.
For demographic data definitions, please refer to the HRMS data definitions resource guide.
STEP 1
Click the My Demographic Data tile.
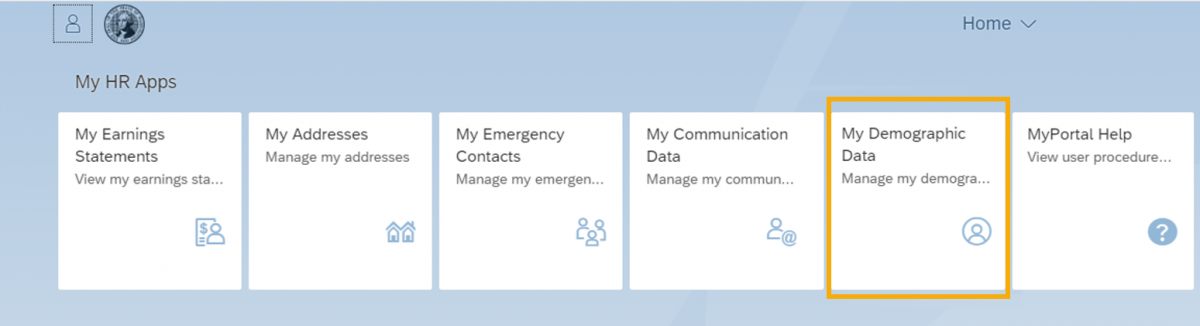
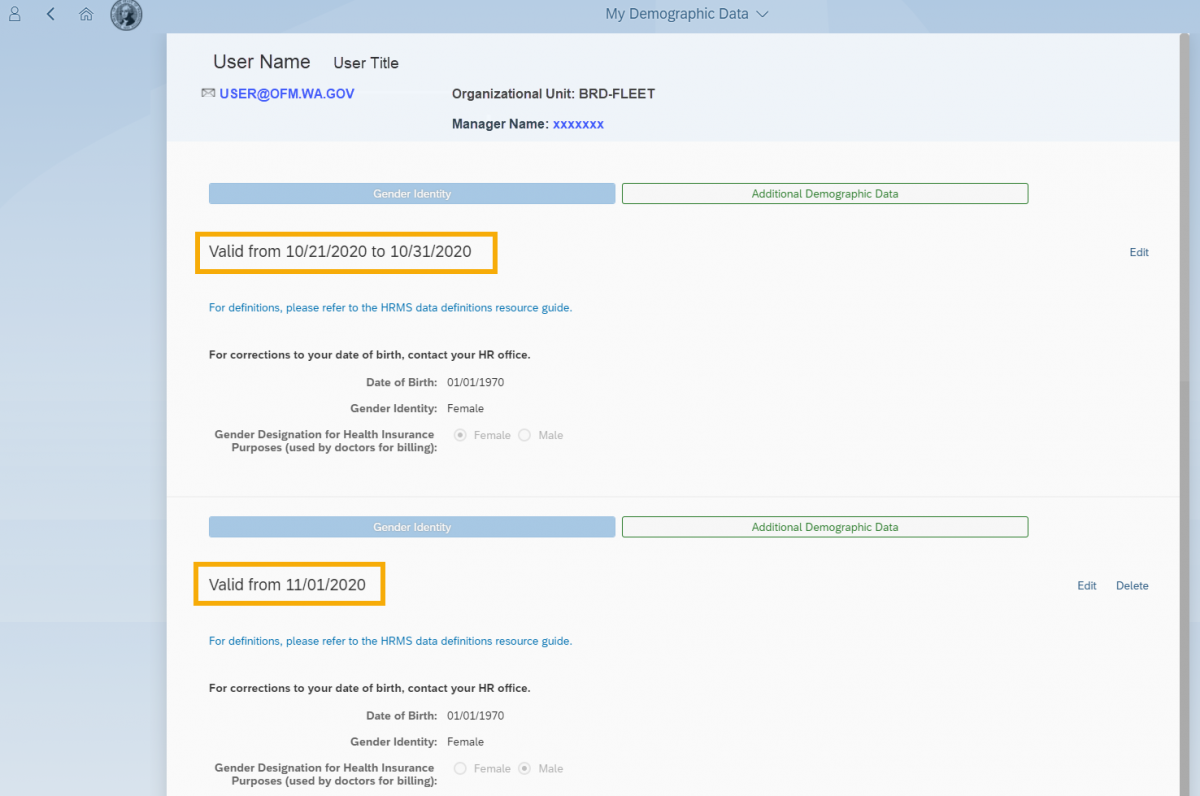
The Gender Identity tab will be displayed with your current information.
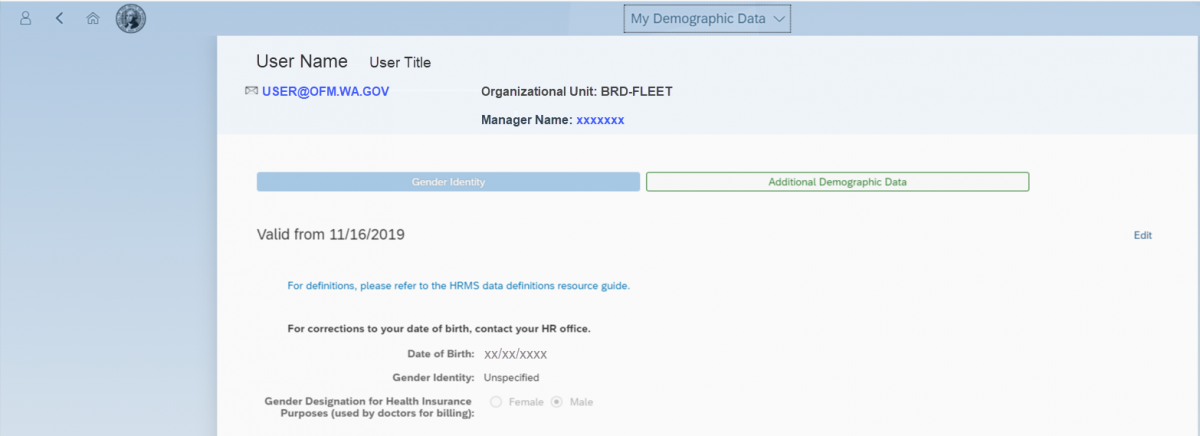
STEP 2
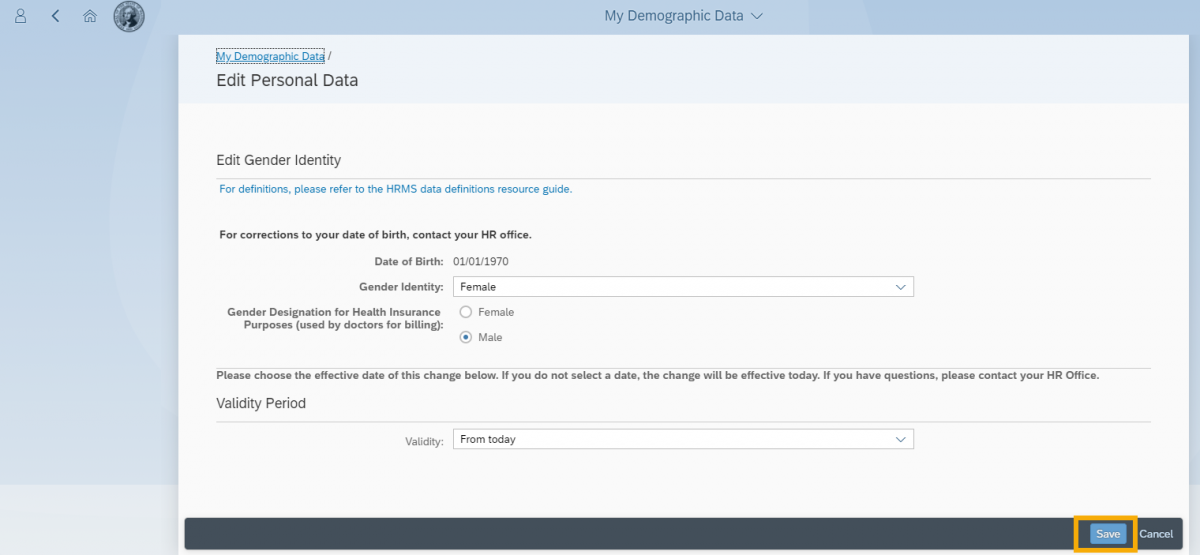
Click the Edit button on the Gender Identity tab to update:
- Gender Identity
- Gender Designation for Health Insurance Purposes
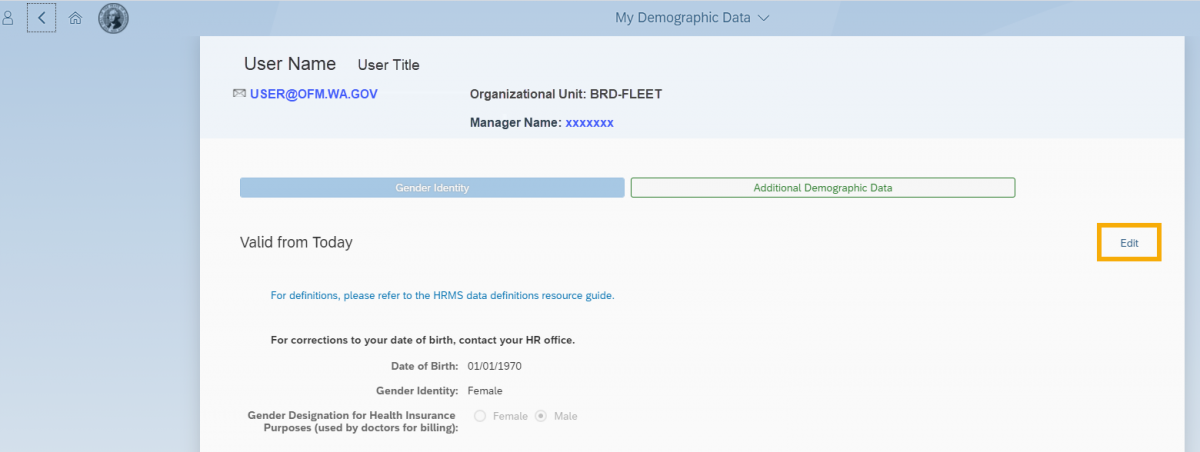
Date of Birth is read only. For corrections to your date of birth, please contact your Human Resources office.
STEP 3
Choose an effective date that is not in the past or keep the default date of today after editing your selections.
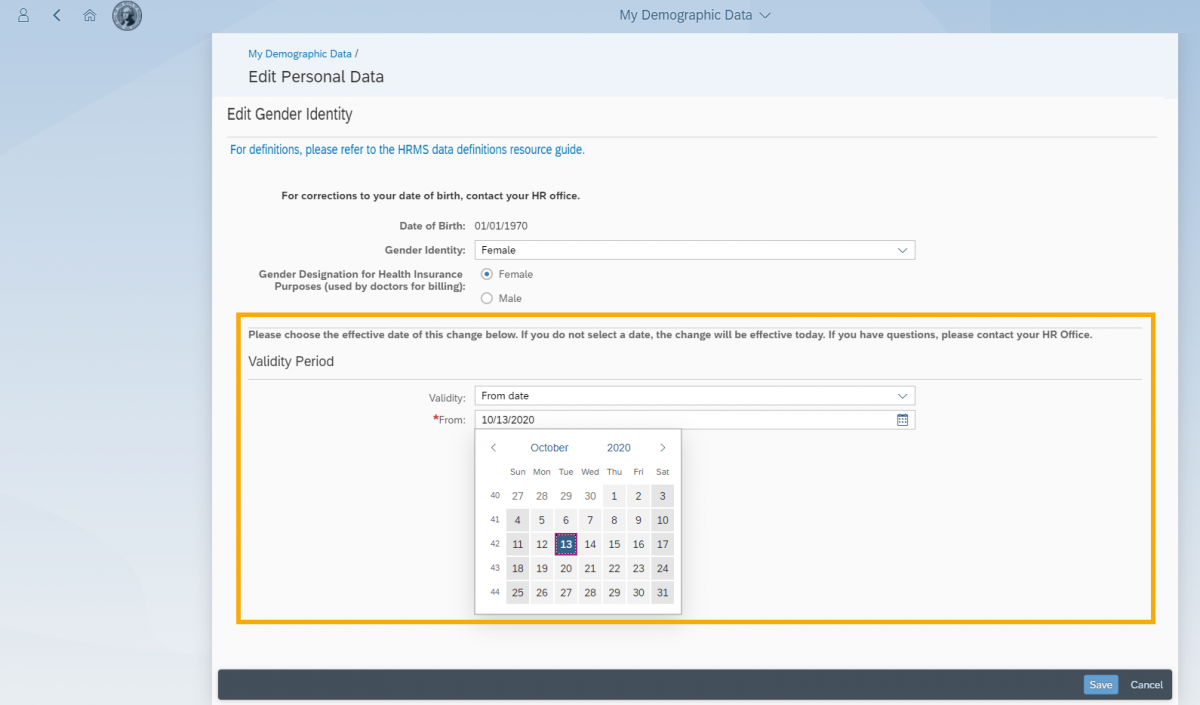
If you select a future date for the validity period then you will see two valid time periods.
STEP 4
Click the Save icon once your edits are complete.
You will receive a confirmation popup “Record Saved” and be returned to the Gender Identity landing page if all fields entered are valid.
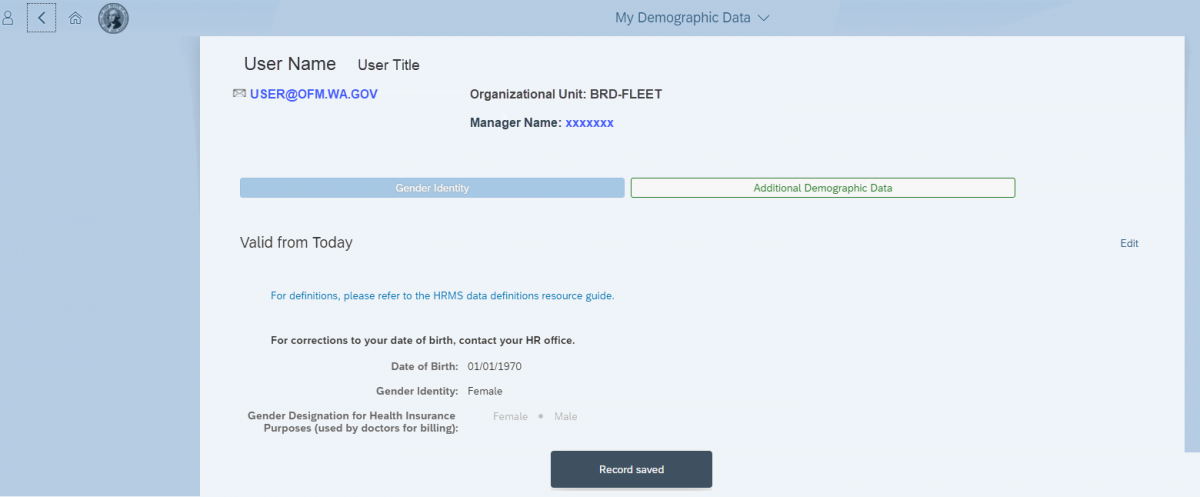
The Valid from date will be updated to today or the selected future date you entered.
STEP 5
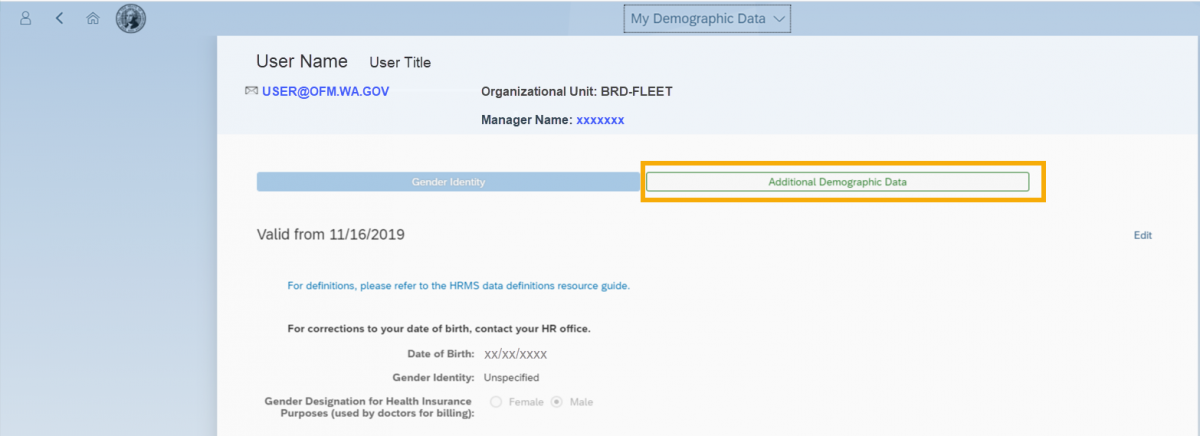
Click the Additional Demographic Data tab.
A new browser window will open.
If a system message is displayed when you login to MyPortal, you will receive the message again when the new browser window is open.
STEP 6
Click the Edit button on the Additional Personal Data tab to update:
- Race/Ethnicity
- LGBTQ+
- Veteran Status
- Military Spouse
- Disability Status
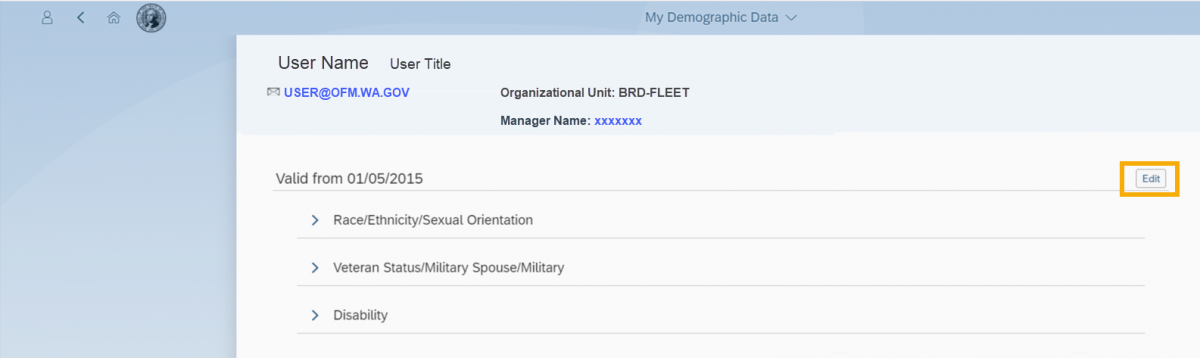
Three demographic sections are available for editing from the Additional Personal Data page:
- Edit Race/Ethnicity/Sexual Orientation
- Edit Veteran Status/Military Spouse/Military
- Edit Disability

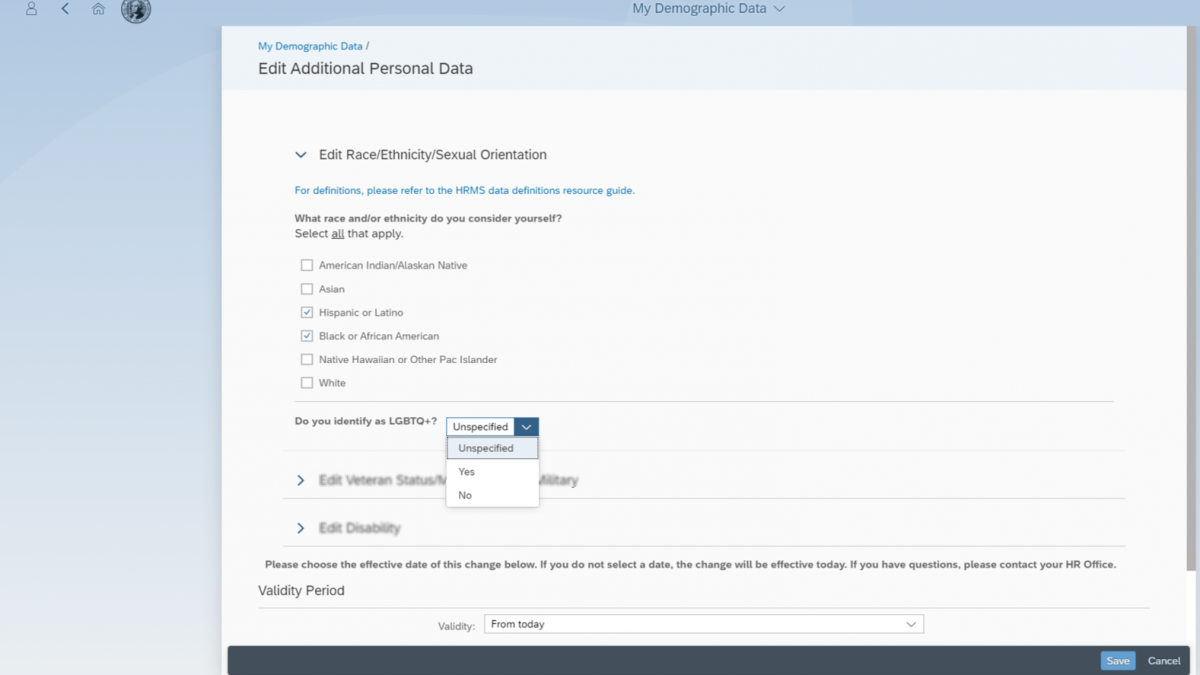
STEP 7
Expand the Edit Race/Ethnicity/Sexual Orientation section by clicking the arrow to the left of the section title.

The Edit Race/Ethnicity/Sexual Orientation section will be displayed allowing you to make edits.
STEP 8
Expand the Edit Veteran Status/Military Spouse/Military section by clicking the arrow to the left of the section title.

The Edit Veteran Status/Military Spouse/Military section will be displayed allowing you to make edits.
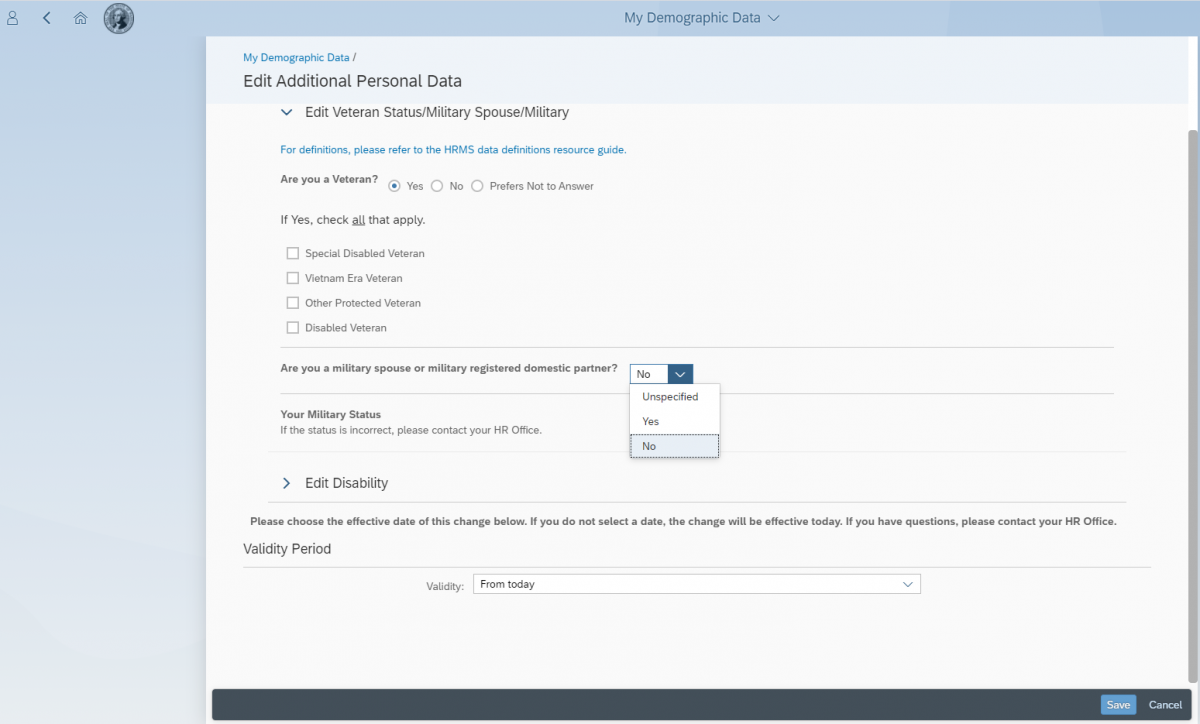
If you answer ‘Yes’ to Are you a Veteran, ‘Other Protected Veteran’ will automatically be checked. You may select another Veteran Status if necessary but please select at least one.
Military Status is read only. Contact your Human Resources office to update this field.
STEP 9
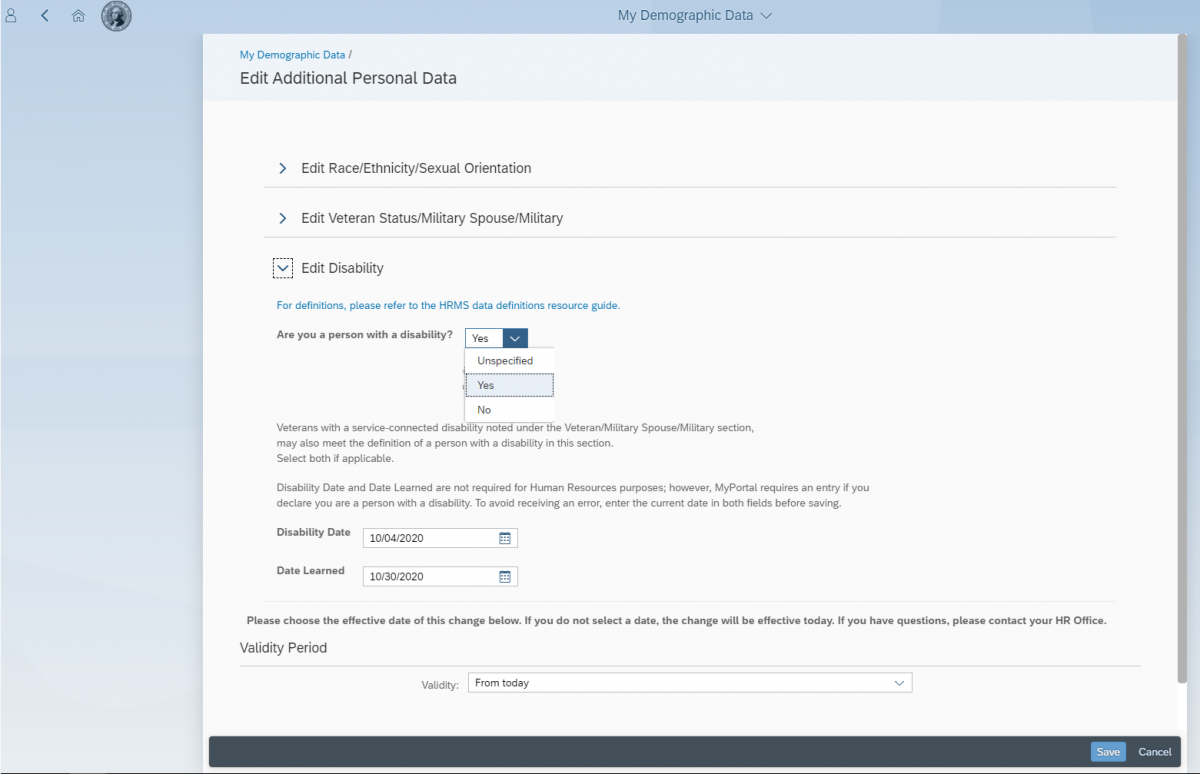
Expand the Edit Disability section by clicking the arrow to the left of the section title.
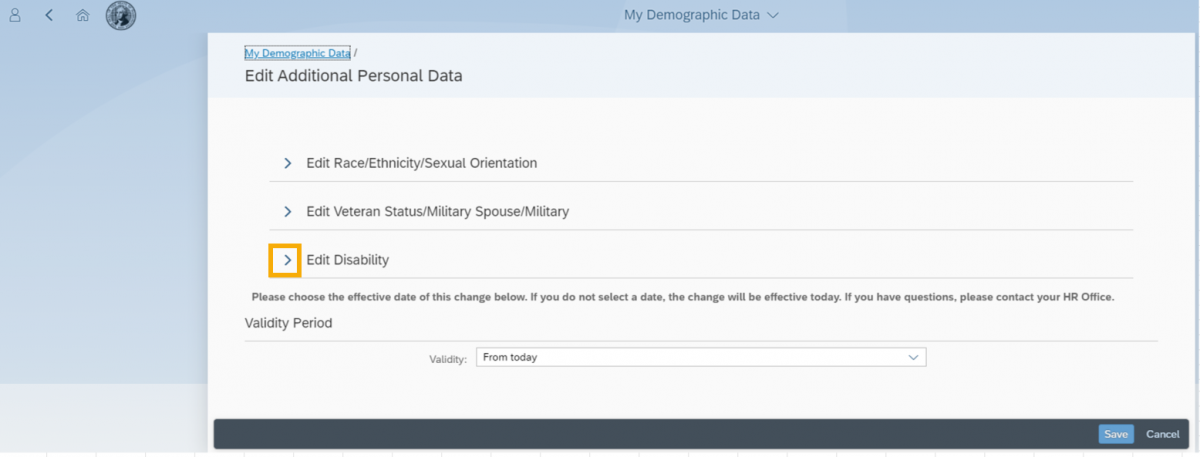
The Edit Disability section will be displayed allowing you to make edits.
STEP 10
Choose an effective date that is not in the past or keep the default date of today after editing your selections.
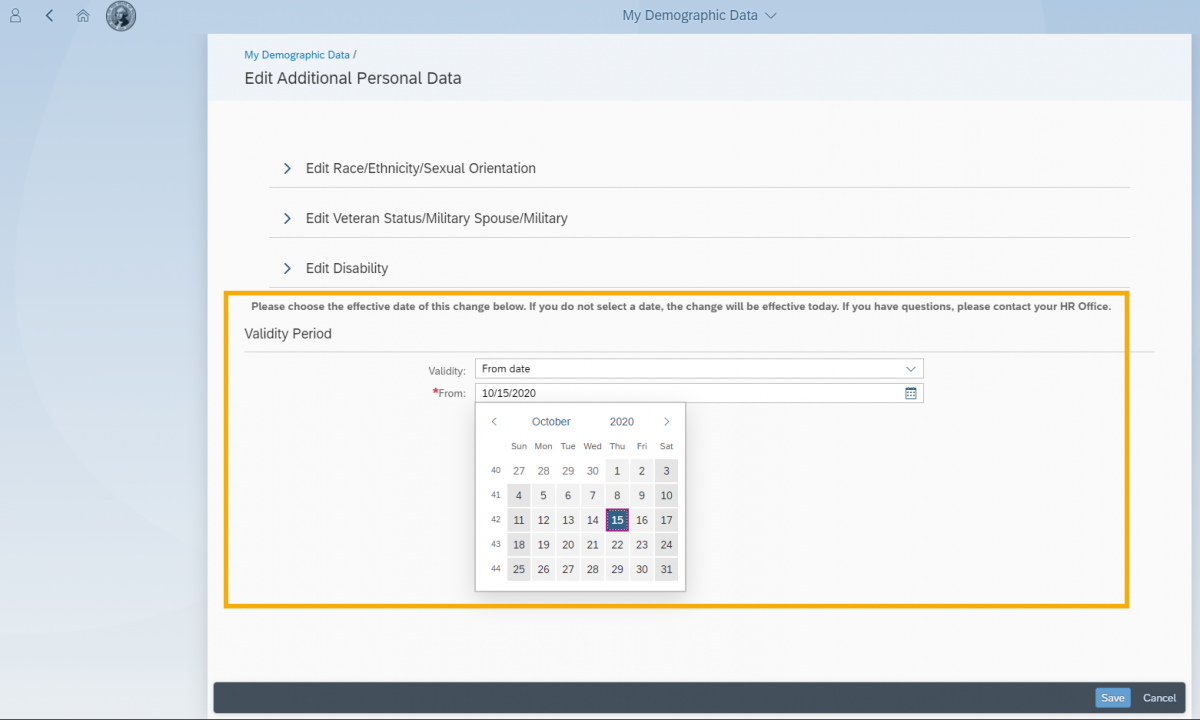
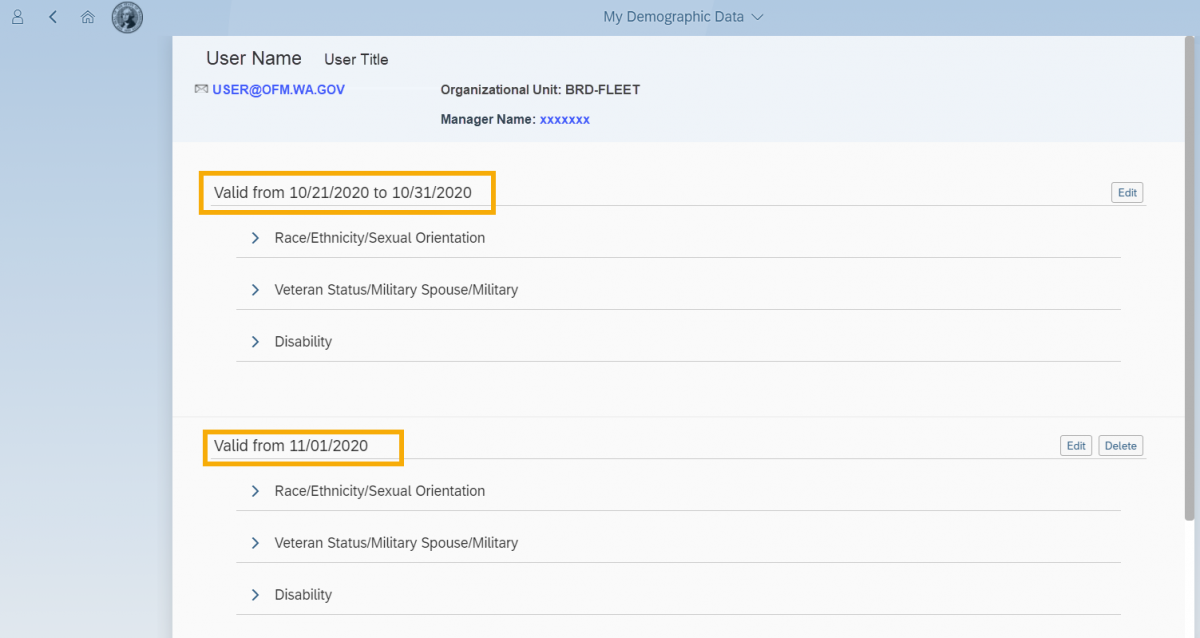
If you select a future date for the validity period then you will see two valid time periods.
STEP 11
Click the Save icon once your edits are complete.
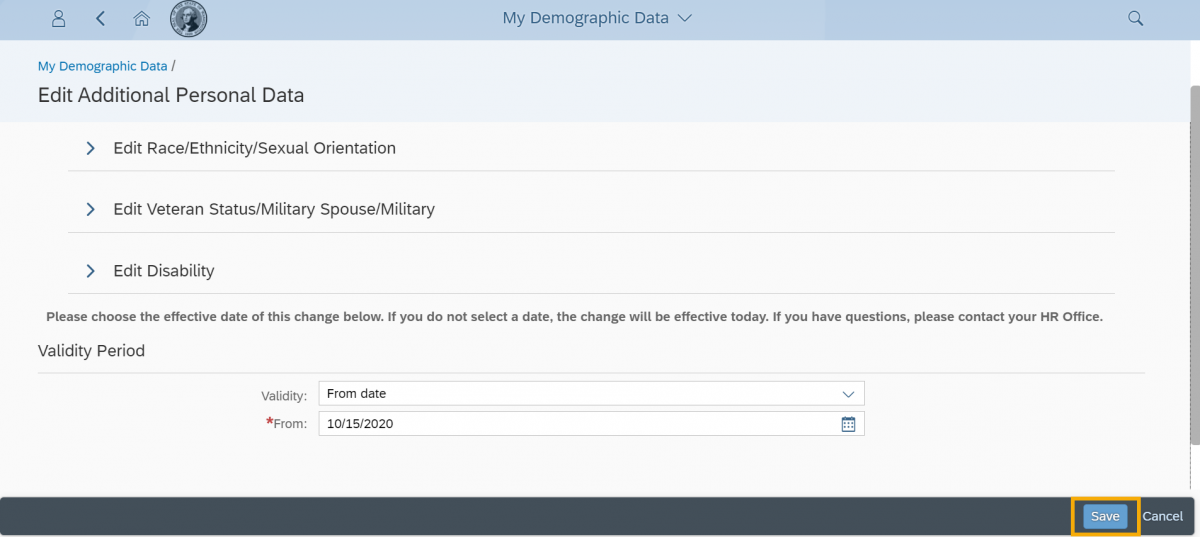
You will receive a confirmation popup “Record Saved” and be returned to the Additional Personal Data landing page if all fields entered are valid.
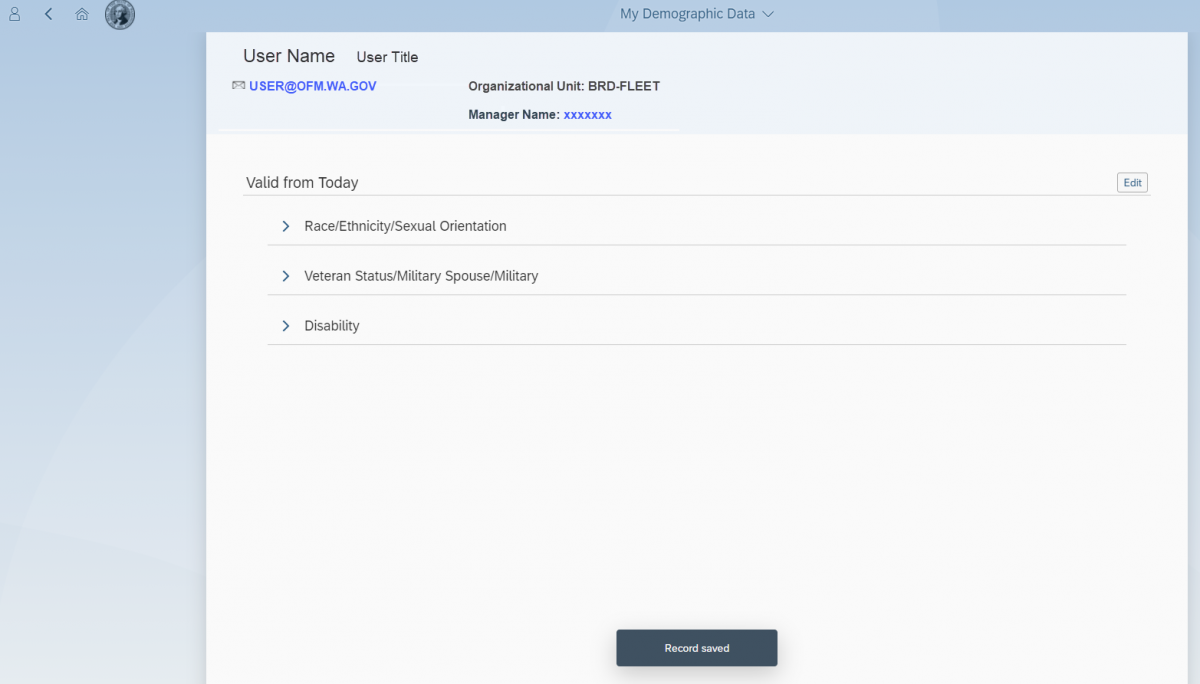
The Valid from date will be updated to today or the selected future date you entered.
